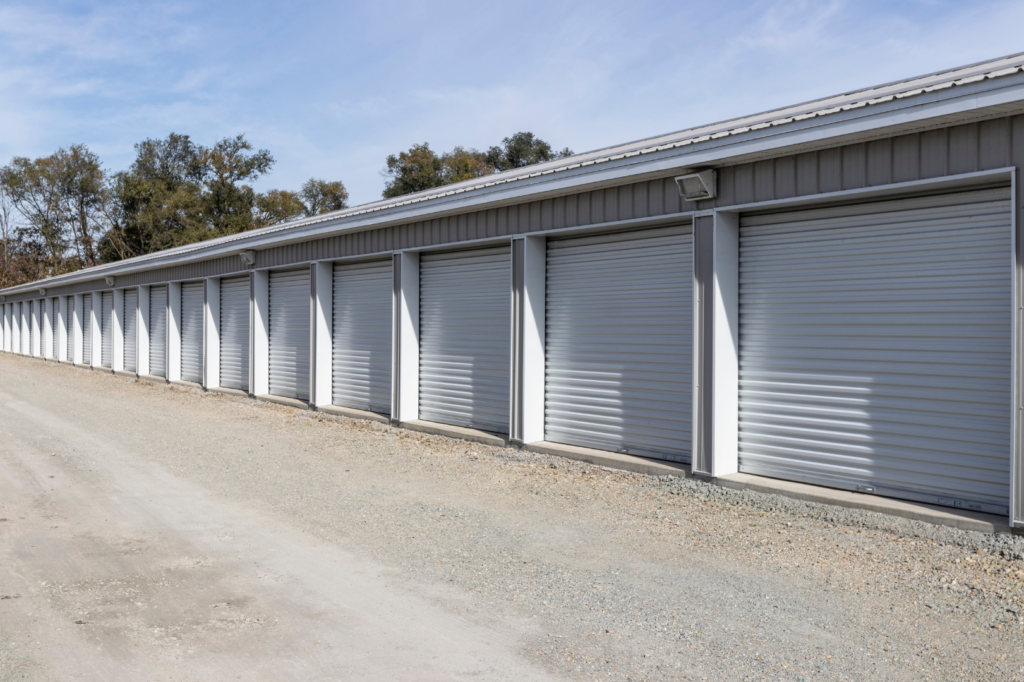
How to Organize a Storage Unit: 15 Pro Tips & Layout Hacks
You roll up the garage-style door, the light flickers on, and a teetering tower of mystery boxes stares back at you. Somewhere inside sits your snowboard, Grandma’s china, and the winter coat you’ll need next week—but finding them feels like excavating a dig site. Good news: turning that chaotic cave into a neat, searchable mini-warehouse is easier than you think.
This guide walks you through 15 battle-tested tactics straight from professional movers, home organizers, and long-term storage tenants. You’ll learn how to map a unit before lifting a single box, which containers stack like Lego blocks, and clever layout hacks that work for any size—yes, even the classic 10×10. The best part? Most supplies cost pocket change or can be MacGyvered from items you already own. Follow along and, six months from now, you’ll grab that winter coat in under 60 seconds. Ready to reclaim your square footage? Let’s start. https://www.youtube.com/embed/8C_z2UhcCSQ
1. Start With a Game Plan: Measure, Sketch, and Take Inventory
Before a single box crosses the threshold, treat your storage unit like a mini-apartment you’re about to furnish. Grabbing a tape measure and notepad now means you won’t be shuffling furniture around later or discovering your sofa blocks the roll-up door. A quick upfront plan is pure back-saving gold.
Why a Floor Plan Saves Hours Later
Adopt the “measure twice, haul once” mindset. Jot down the exact interior dimensions—common footprints like 5×5, 10×10, and 10×15 can vary by a few inches. Note ceiling height and the direction the door rolls or swings. Sketch the rectangle on graph paper or a free room-planner app, marking any light fixtures and the two-foot “no-stack zone” in front of the door. Now you can experiment with couch-on-end versus flat, without sweating through your T-shirt first.
Itemize Before You Box
Next, create an inventory while items are still at home. Snap photos, assign each piece a box number, and drop everything into a simple spreadsheet with columns for “Fragile,” “Heavy,” and “How Often Needed.” When Box 14 says “Kitchen—blender, coffee grinder,” you’ll know exactly where morning caffeine lives.
Decide What Shouldn’t Go in Storage
Some belongings are better off elsewhere. Skip anything perishable, flammable, or alive—think canned food, paint thinner, and houseplants. Important paperwork, jewelry, or the passport you’ll need next month should stay with you, not buried behind a headboard. If you question it, keep it out.
2. Declutter Ruthlessly: Keep, Donate, or Toss
Before you even think about stacking boxes, shrink the mountain. The tighter your edit, the easier it’ll be to learn how to organize a storage unit without paying for a bigger size—or digging through stuff you never use again.
The 4 D’s That Trigger Storage (Death, Divorce, Dislocation, Downsizing)
Most people rent a unit during life-shakeups, so sentimental fog is normal. Acknowledge the emotion, then ask: “Will this help me in my next chapter?” If the answer is no, let it go.
3-Box Sorting System in Action
Set up three large containers labeled KEEP, DONATE/SELL, TRASH. Work room by room; a typical bedroom takes about 30–45 minutes. Touch every item once, decide quickly, and move on—analysis paralysis is the enemy.
How to Schedule Donation Pickups or Recycling
Bag DONATE items, photograph them for a digital receipt, and book a free pickup with Goodwill, the Salvation Army, or a local shelter—most can arrive within a week. Recycle electronics at city drop-offs, and keep digital copies of all receipts for April tax season.
3. Choose Uniform Containers: Clear Bins vs. Cardboard Boxes
Uniform, stack-friendly containers are the secret sauce that keeps a unit from collapsing into leaning towers. Pick one style and stick to it; mismatched liquor boxes and grocery bags create gaps that waste cubic feet and invite topples when you tug out a single bin.
Pros & Cons Cheat Sheet
Here’s the quick side-by-side rundown you need:
| Feature | Clear Plastic Bins | Cardboard Boxes |
|---|---|---|
| Durability | Crack-resistant polymer, lasts for years | Can crush or tear if damp |
| Cost | $$ | $ (often free from stores) |
| Visibility | Contents visible at a glance | Requires label to know what’s inside |
| Stackability | Interlocking lids keep columns stable | Good if same brand/size; otherwise wobbly |
| Moisture Resistance | Excellent; sheds humidity and leaks | Poor; absorbs moisture, warps |
Choose what fits your budget, but commit to one container type for each category so stacks behave predictably.
Matching Sizes = Easy Tetris
Think of your storage unit as a giant game of Tetris. Identical 66-quart clear totes or uniform bankers boxes allow you to build tight, ceiling-high “walls” without odd voids. The result: more vertical space, fewer avalanche risks, and faster retrieval because every column is the same width.
Use Specialty Containers for Odd Items
Some belongings need custom digs. Wardrobe boxes keep suits upright and wrinkle-free. Dish barrels cradle china with double-walled protection. File boxes safeguard paperwork in hanging folders. Investing a few dollars in these one-off containers prevents damage that costs much more to replace.
4. Label Like a Librarian: The Double-Tag Method
Great stacking means zilch if every bin looks the same. A quick double-tag—one label on a side, one on the top—turns hunting trips into grab-and-go missions.
What to Write (and Where)
Use a bold marker to print box number, room, and three key items plus an arrow for THIS SIDE UP. If contents change, tape on a fresh label.
Color Coding & Painter’s Tape Hacks
Color-code by room—blue bedroom, green kitchen, yellow kids’ stuff—using painter’s tape beside the text. The tape peels off clean and lets you ID categories from the doorway.
QR Codes & Inventory Apps
Want nerd-level recall? Free apps like Sortly or ToteScan create QR stickers linking to item photos and spreadsheets. Scan once and know Box-17 holds the coffee grinder.
5. Map Your Unit: Create a Master Index You Can Tape Inside the Door
Labels are handy, but without a map you’re still guessing. A single floor sketch taped by the door turns the unit into an archive you can decode in seconds.
Drawing the Grid
Draw the outline on notebook paper, then drop a 3×3 grid over it. Label columns A–C, rows 1–3. Give each stack a coordinate—“A2 camping,” “C3 couch.” Seal the page in plastic and tape it at eye level.
Digital Backup
Photograph the map and save it to a shared cloud note called “Storage Index.” One search on your phone recalls it if the paper copy disappears.
6. Disassemble & Protect Furniture the Smart Way
Bulky furniture gobbles up square footage faster than anything else. Spend a few extra minutes breaking pieces down and cushioning the surfaces—your future self (and your back) will thank you when it’s time to rearrange or retrieve an item.
Tools & Zip-Bag Hardware System
Keep a basic kit—Phillips and flathead screwdrivers, Allen keys, rubber mallet, and a small socket set—right inside the unit. As you remove legs or headboards, drop every bolt, cam lock, and washer into a labeled zip-top bag. Tape that bag to the underside of the primary panel so it never gets lost in a sea of boxes. One bag per piece, always.
Wrap, Pad, and Vertically Store
After disassembly, swaddle wood and upholstery in moving blankets, then spiral-wrap with stretch film to keep pads from slipping. Store long items—sofas, tabletops, bookcases—on their shortest edge to free up floor area (check ceiling height first). Slip mattress bags over beds to block dust and pests.
Preventing Warping & Mold
Even in climate-controlled units, add silica gel packets inside drawers and plastic wrap around veneered edges to curb humidity damage. Slide furniture onto pallets or plastic risers so air circulates underneath; avoiding direct concrete contact is your best insurance against warping, mildew, and mystery moisture.
7. Elevate Everything: Pallets, Risers, and Plastic Sheeting
Concrete floors sweat, pipes drip, and snowmelt tracks in on boots—any of which can soak cardboard and warp wood. A two-inch lift is cheap insurance that keeps your layout intact and your belongings bone-dry.
Why Off-Floor Storage Matters
Getting boxes and furniture off the slab protects against condensation, surprise flooding, and sneaky pests that scurry along baseboards. It also improves airflow, which fights mildew and that musty “storage unit” smell.
DIY Pallet Platform
Score free heat-treated pallets from big-box garden centers, then sand splinters and inspect for loose nails. Arrange them with one-inch gaps for ventilation and cover with utility plywood if you need a smoother surface. A 10×10 unit usually needs six standard pallets.
Plastic Sheeting for Spill-Proofing
Unroll 6-mil plastic before the pallets go down, letting the edges curl up the walls like a shallow tray. If water seeps in, it pools under the liner instead of wicking into your stash. Replace the sheet yearly or after any visible tear.
8. Stack to the Ceiling—Safely
Vertical space is your cheapest upgrade, yet it’s also where most topple accidents start. Follow these guidelines and you’ll double capacity without creating a cardboard Jenga tower.
Weight Distribution Rules
Think of each stack like a pyramid: heavy, rigid items (books, tools, dishes) on the bottom; medium-weight bins in the middle; linens and décor up top. Cap columns at four to five boxes tall unless you’re using reinforced lids rated for more. Always test stability by giving the base box a gentle nudge—if it wiggles, rearrange before adding height.
Building “Columns” vs. “Walls” of Boxes
Single columns maximize aisle space and let you pull one box without disturbing neighbors, but they’re prone to tipping. For long-term stashes, interlock boxes in a staggered “brick wall” against the back wall; the overlap spreads weight and resists sway. Leave a two-inch gap from walls for airflow and to spot any moisture creep early.
Tie-Down Straps & Bungee Support
Finish each tower with a quick-release ratchet strap or bungee hooked to shelving uprights or the unit’s D-rings (many facilities install them for this purpose). Straps stop vibration shifts when you slide out lower bins and are cheap peace of mind—especially in the Midwest where temperature swings expand and shrink cardboard.
9. Install Freestanding Shelving Units
When floor stacks hit shoulder height, shelves are the logical next move. A single four-tier rack can replace an entire wall of boxes, unlock vertical space you forgot existed, and make it painless to reorganize your storage unit later.
Choosing the Right Shelves
Look for boltless metal wire or resin racks rated at least 250 lb per shelf; they shrug off Midwest humidity better than particleboard. Measure depth—18 inches fits most bins without stealing aisle room. If you’re storing engines or tile boxes, upgrade to heavy-duty steel uprights.
Assembly & Anchoring Tips
Build racks outside the unit, then slide them in. Level feet with shims so nothing rocks, and zip-tie the frame to pallet slats or D-rings to stop tip-overs during box removal.
What Belongs on Shelves vs. Floor
Reserve shelves for frequently grabbed gear: toolboxes, seasonal décor, small appliances, and clear “project” bins. Park immovable furniture, large art, and strapped columns of identical boxes directly on the floor or pallets.
10. Leave an Aisle: Create a “U” or “L” Layout for Access
Even the most perfectly packed boxes won’t help if you need acrobat skills to reach them. Build at least one clear aisle from day one so future you can glide in, grab, and go without restacking half the unit.
Sample Floor Plans for Popular Unit Sizes
- 5×10: Stack along the back wall and one long side, forming an “L” with a 2-foot walkway.
- 10×10: Two side walls plus the rear wall make a roomy “U,” leaving a centered 3-foot path.
- 10×15 or larger: Mirror the “U” but add a mid-aisle break every 8 feet for quick detours.
Minimum Walkway Width
Aim for 18–24 inches if you’ll move solo; bump to 36 inches when two people or dollies are involved. Measure after stacking, not before, to confirm nothing bows into the lane.
Gate Direction & Door Swing Awareness
Store grab-and-go items opposite the hinge side, so the roll-up or swing door never blocks them. Keep aisles perpendicular to the entrance for instant sightlines and faster retrieval.
11. Zone by Category and Frequency of Use
A smart floor plan isn’t just about where things fit—it’s about how quickly you can grab what you need. Divide the unit into three depth zones that mirror how often each group of items sees daylight. This simple rule keeps Saturday errands short and holiday decorating drama-free, and it works no matter if you’re wrangling a 5×5 locker or mastering how to organize a storage unit the size of a one-car garage.
Front-Row, Eye-Level Priority Items
Keep high-turnover gear—seasonal décor, camping totes, and active business files—within the first two feet of the door and between waist and shoulder height for painless lifting.
Mid-Zone for Moderate Use
Store backup furniture, archived clothing, and spare kitchenware midway down the aisle or on middle shelves: easy to reach, but not hogging prime real estate.
Deep Storage for Rarely Used Items
Family heirlooms, long-term keepsakes, and extra renovation materials live at the back or bottom rows, wrapped and padded so they can hibernate undisturbed until the next big life event.
12. Pack Fragile and High-Value Items With Extra Care
Nothing derails an otherwise perfect storage layout like opening a box to find shattered glass or warped photos. A few extra minutes on the packing bench—and the right materials—keep heirlooms intact no matter how many times you reshuffle stacks while figuring out how to organize a storage unit for maximum space.
Bubble-Wrap Burrito & Dish-Pack Method
- Line the bottom of a dish-pack box with 3 inches of crumpled paper.
- Wrap each plate in a “burrito” of bubble wrap, secure with painter’s tape, and stand them on edge like records.
- Fill gaps with more paper, add a cardboard divider every 6–8 inches, and top off with a final cushion layer.
Document & Photo Preservation
Slide papers and prints into acid-free folders, then seal the bundle in a plastic zipper bag with two silica packets. Store upright in a watertight file box placed on a shelf, never the floor.
Small Valuables Strategy
For jewelry, cameras, or collectibles, use a lockable toolbox or fire-rated safe. Keep it near the front for quick access and note the serial numbers in your digital inventory for insurance peace of mind.
13. Climate and Pest Control Precautions
Even a perfectly packed unit can suffer if moisture, critters, or wild temperature swings sneak in. Build a simple defense system while you’re arranging boxes—it’s easier than digging through rows later to rescue soggy cartons or moth-chewed sweaters.
Desiccants & Damp-Rid Placement
Plan on one 10-ounce tub of Damp-Rid (or two fist-size silica canisters) for every 50 sq ft. Set them on pallets, not the concrete, so air circulates through. Check levels at your 30-day walk-through and replace when the crystals liquefy—usually every 60–90 days in Midwest humidity.
Pest Deterrents the Pros Use
Slide cedar blocks between clothing bins to repel moths and silverfish. Tuck cotton balls soaked in peppermint oil along wall edges; rodents hate the scent. Avoid food-based traps or open poison—crumbs invite more pests, and poisoned critters can die in hard-to-reach spots.
Temperature-Sensitive Items
Electronics, leather jackets, vinyl records, and framed artwork all warp or crack when temps yo-yo. Stash them in a climate-controlled unit (ideally 55–80 °F with steady humidity) or insulate boxes with foam sheets if climate control isn’t an option.
14. Tech Hacks: Smart Locks, Motion Lights, and Digital Checklists
Once every box is in place, a sprinkle of technology keeps the unit secure, lit, and perfectly cataloged—no clipboard required. The following low-cost gadgets work in any facility and put an exclamation mark on knowing how to organize a storage unit the modern way.
Keyless Entry Advantages
Swap metal keys for a Bluetooth or Wi-Fi smart lock. You’ll open the door with your phone, share temporary “digital keys” with family, and revoke access instantly when a move is done. Many models also log time-stamped entries, giving you a sneaky audit trail without extra cameras.
Portable Battery Motion Lights
Most units lack outlets, so stick rechargeable LED pucks or light bars to the ceiling magnets or hook-and-loop strips. Motion sensors flip on automatically, freeing both hands for box juggling and saving battery life by sleeping when you leave.
Update Checklists via Voice Notes
Standing in the aisle, dictate a quick voice memo—“Removed Box 12, camping stove”—and let your notes app transcribe it. Later, copy the text into your master inventory or a QR-code database so the paper plan and digital record stay perfectly in sync.
15. Schedule Regular Maintenance Checks
A perfectly packed unit can still go sideways if you never look back. Put upkeep on your calendar the same way you’d book an oil change—quick, recurring appointments that catch small problems before they snowball.
30-Day and 6-Month Walk-Throughs
Every month, spend five minutes scanning for moisture stains, sagging box lids, pest droppings, or strap tension that’s gone slack. Twice a year, pull out the master map and check every quadrant for shifting stacks or cracked lids; restack anything that fails the fingertip “wobble test.”
Rotate Seasonal Items
Use these visits to swap front-row bins: winter gear out, patio cushions in, holiday décor toward the back. This habit keeps high-use items within arm’s reach and prevents the aisle from becoming a dumping ground.
Quick Clean & Re-Label
Knock dust off shelving with a microfiber cloth, sweep loose gravel from the floor, and pop in fresh desiccant packs. If labels look smudged or out-of-date, slap on a new painter’s-tape tag and update your digital inventory before locking up.
Keep Your Unit in Order Year-Round
Organization isn’t a set-and-forget project; it’s maintenance. Bookmark this cheat-sheet for quick refreshers.
- Measure space and draw a plan.
- Photograph items; create a numbered inventory.
- Declutter quickly—keep, donate, or toss.
- Use uniform bins for stable stacking.
- Label two sides for fast reading.
- Tape a laminated map near entrance.
- Disassemble, bag hardware, wrap furniture.
- Raise everything on pallets or risers.
- Stack heavy low, light high, strap.
- Install freestanding shelves for vertical gain.
- Keep clear “U” or “L” aisles.
- Zone by usage: front, middle, back.
- Over-protect fragile, high-value pieces.
- Add smart locks, lights, digital checklists.
- Schedule monthly and semiannual inspections.
In Sioux City? Stay tidy with a Keyless Storage climate-controlled unit.